Your keyboard is one of the most-touched items on your desk, and it collects everything from dust and hair to snack crumbs and skin cells. Over time, this buildup can cause keys to stick or feel gritty. Giving your mechanical keyboard a thorough cleaning every six to twelve months will keep it looking and feeling like new.
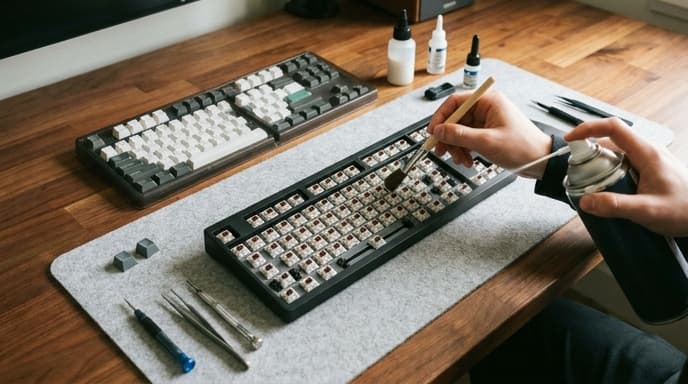
This guide provides a safe, step-by-step process for a deep clean. It might seem intimidating, but it's a straightforward procedure that anyone can do.
What You'll Need
Gather these tools before you begin. Having the right equipment makes the job much easier and safer for your keyboard.
- Keycap puller: A wire-style puller is highly recommended over the plastic ring type, as it's less likely to scratch your keycaps.
- Can of compressed air: For blowing out loose dust and debris.
- Small brush: A clean, soft-bristled paintbrush or a dedicated electronics brush works well.
- Isopropyl alcohol (90% or higher): For cleaning stubborn grime.
- Cotton swabs or a microfiber cloth.
- A bowl of warm water and mild dish soap: For washing the keycaps.
- Your phone's camera: To take a picture of your keyboard layout before you start!
The Deep Cleaning Process: Step-by-Step
Set aside about an hour for this process. Don't rush it.
Step 1: Unplug and Photograph
First, unplug your keyboard from your computer. This is non-negotiable. Then, take a clear, well-lit photo of your keyboard. This will be your map for putting the keycaps back on correctly later. Don't skip this step!
Step 2: Remove All Keycaps
Using your wire keycap puller, gently remove all the keycaps. Hook the wires under two opposite corners of a keycap and pull straight up with a gentle wiggling motion. Be extra careful with larger keys like the spacebar, Enter, and Shift keys, as they have stabilizers. These are small wires or plastic inserts that need to be unhooked carefully. Place all your keycaps in a bowl to the side.
Step 3: Clean the Keyboard Body
With the keycaps off, you'll see the keyboard's plate and switches. Turn the keyboard upside down and give it a gentle shake to dislodge any large debris. Then, take it outside or to a well-ventilated area and use your can of compressed air to blow out the rest of the dust. Use short bursts and hold the can upright. Use your small brush to sweep away anything that's stuck between the switches.
For any grime on the plate, lightly dampen a cotton swab or microfiber cloth with isopropyl alcohol and carefully wipe it away. Do not pour any liquid directly onto the keyboard.
Step 4: Wash the Keycaps
Fill a bowl with warm water and add a few drops of mild dish soap. Drop your keycaps in and let them soak for at least 30 minutes. After soaking, you can swish them around or gently scrub any particularly dirty ones with your brush. Do not use this method for keycaps with printed legends that are not doubleshot or dye-sublimated, as harsh soap could wear them off. When in doubt, wipe with a damp cloth instead of soaking.
Rinse the keycaps thoroughly with clean water and lay them out on a towel to air dry completely. Make sure they are 100% dry on the inside and out before putting them back on the keyboard. This can take several hours.
Step 5: Reassemble
Once the keycaps are completely dry, consult the photo you took earlier and begin placing them back onto the correct switches. Press each one down firmly until it clicks into place. Re-attaching the stabilizer keys can be tricky; make sure the stabilizer bar clips correctly into the keycap's inserts.
Quick Maintenance Tips
To avoid frequent deep cleans, unplug your keyboard once a week, turn it upside down, and give it a few firm taps to shake out debris. You can also use a brush to quickly dust between the keys.
Frequently Asked Questions
Can I put my keycaps in the dishwasher?
It's not recommended. The high heat can warp or damage the plastic. Hand washing is much safer.
What if I spill a drink on my keyboard?
Unplug it immediately. Turn it upside down to drain as much liquid as possible. Follow a disassembly guide for your specific model if you are comfortable doing so. The best course of action is to let it dry for several days before plugging it back in. A comprehensive spill guide is a topic for another article.
Is isopropyl alcohol safe for the keyboard?
Yes, as long as you use a high concentration (90%+) and apply it with a cloth or swab, not directly. It evaporates quickly and is effective for cleaning electronics.
Key Takeaways
- Always unplug your keyboard before cleaning and take a photo of the layout.
- Use a wire keycap puller for the safest removal of keycaps.
- Clean the keyboard frame with compressed air, a brush, and a small amount of isopropyl alcohol on a cloth.
- Wash keycaps in warm, soapy water and let them air dry completely before reassembly.
- Regular, light dusting can extend the time between deep cleans.
Related Reading
- How to Check Your PC's CPU and GPU Temperatures
- Cable Management Tips for a Cleaner, Cooler Gaming PC Setup
- What Are Mouse DPI and Polling Rate? A Gamer's Guide