When you connect to a game server or browse the PlayStation Store, your console uses something called a Domain Name System (DNS) server to translate human-readable addresses (like `example.com`) into computer-readable IP addresses. By default, your console uses the DNS server provided by your Internet Service Provider (ISP), which isn't always the fastest or most reliable option.
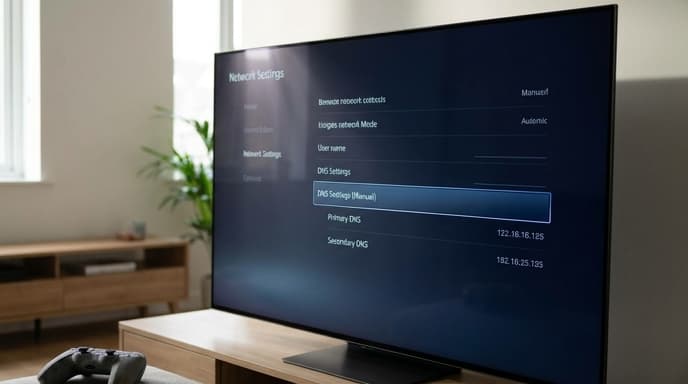
Switching to a well-regarded public DNS server can sometimes result in faster game downloads, quicker store navigation, and even a more stable connection for online multiplayer. It’s a simple, free, and completely reversible tweak that is worth trying.
Finding a Public DNS Server
Before you change any settings, you need the addresses of the DNS server you want to switch to. There are several reputable free options. You'll need both a Primary and a Secondary address.
- Google Public DNS: Primary: `8.8.8.8` / Secondary: `8.8.4.4`
- Cloudflare DNS: Primary: `1.1.1.1` / Secondary: `1.0.0.1`
- OpenDNS: Primary: `208.67.222.222` / Secondary: `208.67.220.220`
Any of these are excellent choices. For this guide, we'll use Google's DNS as the example.
How to Change DNS on a PlayStation 5
The PS5 menu makes this process straightforward.
- From the home screen, go to the Settings cog in the top-right corner.
- Select Network.
- Under the 'Connection Status' tab, select Settings, then choose Set Up Internet Connection.
- Hover over your current network (Wi-Fi or LAN) and press the Options button on your controller. Select Advanced Settings.
- In the Advanced Settings menu, find DNS Settings and change it from 'Automatic' to Manual.
- Two new fields will appear: Primary DNS and Secondary DNS.
- Enter `8.8.8.8` for the Primary DNS.
- Enter `8.8.4.4` for the Secondary DNS.
- Select OK. Your PS5 will test the connection and save the new settings.
How to Change DNS on an Xbox Series X/S
The process on Xbox is just as simple.
- Press the Xbox button on your controller to open the guide.
- Navigate to Profile & system > Settings.
- Under the 'General' tab, select Network settings.
- Select Advanced settings.
- On the Advanced settings screen, select DNS settings, and then choose Manual.
- A screen will appear for you to enter the IPV4 DNS addresses.
- For the Primary IPV4 DNS, enter `8.8.8.8` and press the Menu button.
- For the Secondary IPV4 DNS, enter `8.8.4.4` and press the Menu button.
- Your console will check the connection and confirm the changes. You can then back out of the menu.
Frequently Asked Questions
Will changing my DNS lower my ping in games?
Probably not. Ping (or latency) is mostly determined by the physical distance and routing to the game server itself. DNS is used for the initial lookup to find that server. While a faster DNS can make the initial connection quicker, it won't typically affect your in-game latency.
Is changing my DNS safe?
Yes, it is perfectly safe. You are simply changing the directory your console uses to look up internet addresses. Using reputable public DNS providers like Google or Cloudflare can even enhance security and privacy compared to some ISP DNS servers.
How do I go back to the default settings?
Simply follow the same steps, but when you get to the DNS Settings screen, choose 'Automatic' instead of 'Manual'. Your console will revert to using your ISP's default DNS server.
Which DNS server is the absolute fastest?
This depends entirely on your location and your ISP's network. While Google and Cloudflare are fast for most people, the only way to know for sure is to test them. Try one for a week and see if you notice an improvement, then try another.
Key Takeaways
- Changing your console's DNS server is a safe and easy way to potentially improve download speeds and connection stability.
- Popular and reliable public DNS providers include Google (8.8.8.8) and Cloudflare (1.1.1.1).
- On both PS5 and Xbox, the option is found in the advanced network settings for your current connection.
- Change the DNS setting from 'Automatic' to 'Manual' to enter the new Primary and Secondary addresses.
- If you don't see an improvement or encounter issues, you can easily switch back to 'Automatic' at any time.
Related Reading
- How to Clear the Cache on Your PS5, Xbox, and Nintendo Switch
- Running Out of Space? How to Manage Storage on Your Streaming Device
- How to Listen to Podcasts and Audiobooks on Your PlayStation or Xbox