Looking at stunning photos of the Milky Way, you might think you need thousands of dollars in camera equipment to get started in astrophotography. But the powerful camera you carry every day is more capable than you think. With the right technique and a few key settings, you can take impressive photos of the night sky with your smartphone.
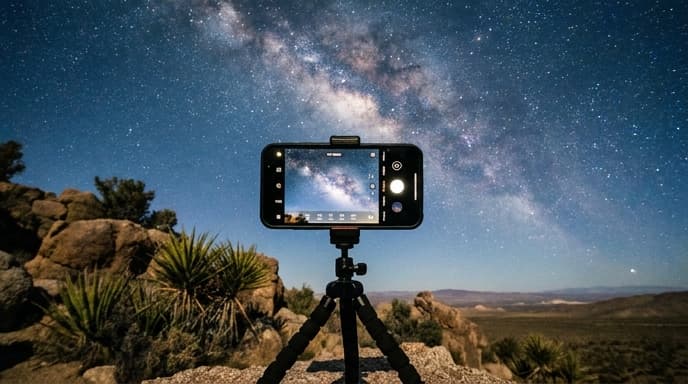
This guide will walk you through the essential steps, from the gear you need to the settings you'll use to transform a dark sky into a beautiful photograph.
Step 1: Get the Essential Gear (It's Just One Thing)
To capture the faint light of stars, your phone's camera needs to stay open for several seconds. Even the slightest movement during this time will result in a blurry mess. That's why the single most important piece of gear is a tripod.
You don't need an expensive one. A small, simple smartphone tripod will do the job perfectly. This will hold your phone completely still, which is the non-negotiable first step to getting a sharp image.
Step 2: Find a Dark Sky
Your phone's camera is fighting to see faint starlight. The biggest obstacle is light pollution from cities and towns. For the best results, you need to get away from bright lights. A rural park, a quiet beach, or even a suburban backyard can be dark enough to get started. Use a light pollution map online to find dark sky locations near you.
Step 3: Use the Right Camera Mode
Your standard 'Photo' mode won't work here. You need to use a mode that gives you more control. You likely have one of two options:
- Night Mode: Many modern phones have a dedicated Night Mode that automatically detects low-light scenes. When you hold the phone steady on a tripod, this mode will often allow for very long exposures (up to 30 seconds on some models), which is perfect for capturing stars.
- Pro or Manual Mode: This mode gives you full control over the camera's settings. It might be labeled 'Pro,' 'Manual,' or 'Expert' in your camera app. This is where you can manually adjust the key settings for astrophotography.
Step 4: Dial in Your Settings (in Pro Mode)
If you're using Pro mode, you'll need to set things up yourself. It might look intimidating, but you only need to worry about three main settings.
1. Shutter Speed: This controls how long the camera's sensor is exposed to light. For stars, you want a long exposure. Start with a shutter speed of 10 to 20 seconds. The longer the shutter is open, the more starlight you'll capture.
2. ISO: This controls the camera's sensitivity to light. A higher ISO makes the sensor more sensitive. Set your ISO to a high value, such as 1600 or 3200. Be aware that a very high ISO can make the photo look grainy, so you'll need to experiment to find the right balance for your phone.
3. Focus: Autofocus will fail in the dark. You need to set your focus manually. In Pro mode, look for a focus slider and move it to the 'infinity' setting, often marked with a mountain icon (⛰️). This sets the focus for distant objects.
Finally, use your camera's self-timer (set to 2 or 3 seconds). This ensures that the motion of you tapping the screen to take the picture doesn't shake the phone and blur the shot.
Frequently Asked Questions
Why are my photos just blurry streaks?
This happens if the phone moves during the long exposure. Make sure your tripod is stable and on solid ground. Also, a very long shutter speed (over 30 seconds) can sometimes show the stars themselves streaking slightly due to the Earth's rotation.
How do I photograph the moon?
The moon is incredibly bright, so you need the opposite settings. Use Pro mode with a very low ISO (like 100) and a very fast shutter speed (like 1/250s). You will need to experiment, but do not use Night Mode for the moon.
Can I edit my star photos?
Absolutely! A little editing can make a huge difference. Use your phone's built-in photo editor to slightly increase the brightness, contrast, and highlights. This will make the stars pop against the dark sky.
Key Takeaways
- A tripod is essential for keeping your phone perfectly still during a long exposure.
- Find a location with as little light pollution as possible for the best results.
- Use your camera's dedicated Night Mode or switch to Pro/Manual Mode.
- In Pro Mode, set a long shutter speed (10-20s), a high ISO (1600+), and manual focus to infinity.
- Use the camera's self-timer to avoid shaking the phone when you start the shot.
Related Reading
- A Beginner's Guide to Using Stargazing Apps on Your Phone
- Understanding Light Pollution and How to Escape It
- What Are Mouse DPI and Polling Rate? A Gamer's Guide